Showing posts with label easy. Show all posts

Monday, 7 April 2014

#bloggersdoitbetter Week 1!

So finally it's the first week of the #bloggersdoitbetter Challenge! I've been so excited to finally write about it. If you don't know what it is check out my earlier post about it here!

So basically the challenge is to write a post that's out of your comfort zone to broaden your post and be more creative. And this weeks theme is Spring! I was so excited about this weeks theme because you can really do anything with it, food, fashion, beauty, lifestyle, memories etc.
But being me, I chose food!

I've never done a food post before so this weekend I decided to make Spring/Easter inspired cupcakes and I'm going to tell you how I made them!

Recipe:
Cupcakes
150ml Vegetable Oil
2 Eggs
1 tsp Vanilla Extract
75g Unrefined Caster Sugar
150g Self-raising Flour

Buttercream
140g Unsalted Butter
250g Icing Sugar
1-2 tbsp Milk
few drops of food colouring

Instructions:
1. Preheat oven to 170C or gas mark 3 and line a muffin tray with 10-12 paper cases.
(I used twelve :))
These adorable spring cases were £1.22 from Asda and the colours are so cute!

2. Next whisk together the oil, eggs, and vanilla extract until well blended. ( You could use a hand whisk or electric whisk)

It should look like this (at least mine did!)

3. Then add the sugar and flour and whisk until well blended.
And mine ended up like this. I thought it was quite thick for cake mix but it worked anyways!

4. Then spoon it into the cases and put in the oven for 15-20 minutes or until golden brown. If you want to check if they're cooked properly then insert the tip of a knife/skewer through the middle and if it comes out clean then it's cooked!

5. Next for the butter cream. Put the butter into a bowl and beat until soft.

6. Then add half the sugar and beat until smooth.

7. And then add the remaining icing sugar and if you want the butter cream to be smoother just add a tbsp of milk and mix it all together.

8. Add a few drops of the food colouring and mix together.
(we made a spring green colour, and it was supposed to be pink but turned out orange :( ooops but it's still quite a spring colour!)

9. And then either spread your butter cream over the top of the cupcakes or if you have a piping bag then you could use that. If you don't have a piping bag then you could make your own like we did!
We just got a normal sandwich bag or freezer bag and then put all of the icing in and squeezed it into one corner. We then snipped off a tiny bit of the corner so the icing could come out. 
You then just squeeze and swirl the icing around her cakes! (it does get a bit messy!)


10. And lastly just decorate your cakes with whatever you want! For ours we used Mini Eggs to plop on the top to give it a cute Spring look. You could use chocolate eggs, flakes, or sprinkles to make these look even more delicious.

The final product!!

( I also added some cheeky sprinkles on there)

Anyways I'm quite chuffed with how these turned out, and they were really easy to make. They're also pretty delicious!! 
I also quite enjoyed writing this post, I might do more food posts in the future!

Anyways thanks for reading and I hope you enjoyed this little recipe of something I love to do in my spare time.
Also keep posted so you know how to make these fabulous cupcakes (I couldn't just make one batch now could I? ;))

Stay Happy!
Sarah


Wednesday, 26 March 2014

Hair Challenge- More Plaits!

So for my hair challenge today I've left it really simple again because I'm not in college today (hence the dressing gown and 1D t-shirt)
Last night I had a shower and washed my hair and then when I got out I brushed it and let it air dry a tiny bit until it was just damp. This way, if you have thick hair like me, then it will be dry in the morning. (Some times I wake up, and if it was too wet before I went to bed, I find my hair in the middle still wet)

I then just started French Plaiting my hair. Lots of practise makes perfect with this and I'm still not that good at it. Sometimes I get my mum to help me out :) But if you don't know how to French Plait you could look it up online or simply just do a normal plait with all your hair. 

and then I go to sleep.
When I wake up, if I have college, I would normally take the plait out and leave my hair wavy but since I'm not going anywhere today I decided to leave it up because my hair and fringe is out of my face whilst I do work. 


I think this is a really cute hair style and it's so easy to do too! and then when you take the plait out it's like a completely new hairstyle!

Hope you like it!
Stay Happy
Sarah

Tuesday, 25 March 2014

Hair Challenge- Plain and Simple


So today for my hair challenge I woke up pretty late and was unfortunately rushing so I couldn't really do an elaborate hairstyle but instead this one is one of the easiest hair styles I've ever done. 
So it's simply a half up, half down hair do but instead of using a bobble, I've used a big clip.


For this I simply split half of my hair, leaving my fringe out (you could use bobby pins to secure your fringe a long with it) and gathered it behind my head with a big clip. And that's it.


I think this hairstyle is super casual, and I just wore it with a t-shirt and jeans. And it's so easy and quick to do, perfect for if you're late for work/college. I use it all the time! 

Hope you liked this post and I'm super sorry about the iPhone camera quality, I think most of them will be taken on my phone :(

Stay Happy!
Sarah

Saturday, 1 June 2013

Video

So my new video is up on YouTube!
Want to know how I made these shorts?


Then check out my new YouTube video here>>>http://www.youtube.com/watch?v=PkS5dPz2j08

Thanks for reading,
Stay Happy,
Sarah

Friday, 24 May 2013

Hair!

Hey everyone!
So today I dyed my hair and I though I would share my experience with you and this is also a review for the Schwarzkopf Live Colour XXL hair dye.
Firstly I thought I'd tell you about the dye. It was £4.29 from Boots in Manchester and the colour I buy is 92 Pillar box Red. I dyed my hair red from a light brown a few months ago, and I loved it. The first time I did it was quite dark though so each time I've gotten a brighter shade. I started off with the brand Ferriar and did the two red shades in that brand. Then I changed to XXL which I used last time and also this time. I used this colour again because I was really happy with the results and the brightness of the colour.


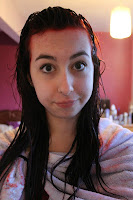
To start I thought I'd show you what my hair looked like before I dyed it. This was my hair today, about six weeks after dying it the last time. The colour is semi-permanent so I didn't really expect anything different.

My roots were pretty bad but I'm quite tall so my theory was that no-one was really looking at the top of my head anyway :) I know now that it doesn't work like that.

The ends of my hair were also pretty bad, it looked like I'd dip-dyed my hair brunette with red at the top. So I needed to concentrate on them.


In the pack you get a pair of gloves, which usually have holes in (I recommend using your own, these plastic ones get on my nerves anyway), two packs of lovely smelling conditioner and the tube of colour.


So the instructions say to wash your hair lightly with shampoo but I just wet mine because I'd washed it the night before properly. I then put a towel round my shoulders (wearing old clothes) and got to work. The colour comes out the tube kind of like tomato puree, that's the best I can describe it. It doesn't smell bad either like some hair dyes that give me headaches, this one smells quite nice. 
I started with the roots of my hair and then did the middle, making sure I got the back. I also did my fringe at this point too. And then I concentrated on the ends. I think I put the most on the ends because last time I didn't put enough on. Then with the rest of the colour I just touched it up and made sure everywhere was covered. I rubbed the dye in, making sure it covered all my hair and I left the dye on for thirty minutes and then washed it off.

I rinsed it thoroughly first, and then shampooed it, with my Pantene Colour Protect shampoo and then rinsed that. I then lathered it in the packet of lovely smelling conditioner and left it for about two minutes and then rinsed it all. I then added my heat protect serum, blow dried it and then straightened my fringe. And this was the result!


From these pictures it doesn't look that bright, that's just because of my crappy lighting but it looks better in person. I'm really happy with out it's turned out because you can never tell with hair dye what's going to happen. I'm also chuffed with the XXL colour because it's the brightness I want it. My hair feels so soft from the conditioner and looks in good condition too which is a bonus. There was no problems with the dye, except the gloves and that I would probably buy another box too, because my hair is quite thick and longish. But other than that its a perfect price, perfect colour and it's easy to apply! Highly Recommneded by me!

Thanks for reading,
Stay Happy,
Sarah


P.s. These are some better pictures of the colour of my hair. I'm also modelling my new headband I bought today. If you want to know where it's from and how much it was, follow and keep posted because I will be posting a haul video, including this headband! It was a great buy so keep your eyes peeled!

Thursday, 23 May 2013

DIY Denim!

Hey Guys!
So when I went to get changed today I put a pair of denim jeans on that had gotten a hole in them quite a while ago. The hole wasn't particularly big but over time it's gotten bigger and bigger, so now it just looks like it's gaping, and looks a bit trampy so I decided to make them into shorts. I really wanted a pair of denim shorts for the summer, so I thought why not save some money and make them myself. I've made shorts from pants before so I thought I'd just show you how I did it :)
So from these jeans.....


to these funky denim shorts.


So if you would like to see the transformation just keep reading :)


To start the only things you'll need are:
A pair of scissors
And some chalk (optional but it just helps)

 The first thing you need to do with lay your jeans out flat on the floor facing up. Then this is optional but I don't like cutting the whole leg off at once so I fold the jean leg up at the knee so it creases and then I draw a line with my chalk where I want to cut it.


 and then this is the result. You could always leave the jeans like this with the 3/4 length. It's great for summer, and they're really fun to wear with a pair of dolly shoes or converse. 


 The next thing you need to do, preferably when you have the jeans on, is mark where you want to cut the leg off at. I recommend doing it a little bit longer than you want them to be, because you can always trim them to the proper length you want later on. Just mark the length you want with some chalk or a pencil.

And then you can take them off and draw a line the whole way across the leg. Then start to cut the leg across the line. It doesn't have to be especially neat because you can always trim them neater later on.
So after you've cut the front of the jeans, turn them over so they're face down and carry on with the same line along the back. If it helps draw the line in chalk first like I have done.


 And then just trim the edges to make sure they look neat. 
After you've done this, do exactly the same with the other leg, making sure the leg lengths stay the same. If you trim one side a little bit, make sure you trim the other side the same amount so they look even.
Eventually they should look something like this:

But as you can see from the second picture, the bottom of my shorts at the back is longer than the front so I took them off again and trimmed them down. I kept repeating this, trying them on for size, and then taking them off and trimming away some of the length until they were the size I wanted them to be. Eventually I got them the way I wanted them.

And finally, to finish them off I didn't want the bottom of my shorts to be straight, because they obviously look cut so I started to fray the bottoms. To fray the shorts I just picked at the white threading at the bottom, so it came out of place. This left the ends of the blue threads on their own, which made them look fuzzy. I carried on doing this all the way round the bottom of the shorts and got this effect:

You don't have to do this but I think it makes the shorts look a whole look better.

And there you have it, brand new looking shorts. These shorts are perfect for the summer or because the weather here in the UK is still FREEZING you can always pair them with some tights and a long sleeved tee. I can't wait to wear these and take them on my holidays, where I can wear over my bikini by the pool or on the beach. I'm getting way too excited!

So I hoped this helped if you were making your own shorts, and if you did, let me know how they went. But if you were just reading this for inspiration, I hope they inspired you to create your own. You don't even need a nice pair of jeans. I've used a cheap pair from a charity shop before or even hand me down clothes are perfect, you don't need to spend loads on a pair of jeans just to cut them up. I've had these jeans for years and I think they are finally worn, but not anymore! I can get loads more wears out of these shorts now!
Hope you like them,
Stay Happy, 
Sarah